Introduction to Photoshop
Photoshop is a tool for artists to create anything they want to do.
It’s also a great tool to contribute to other projects involving different media platforms.
For example, you could incorporate some creations that you made on photoshop into a film project on Adobe Premiere Pro.
This week we have been discussing different basic tools of photoshop and how they can be used. These tools include:
- lasso tool,
- magic wand,
- crop,
- clone stamp,
- blur,
- smudge,
- burn,
- brush,
- eraser,
- spot healing and more.
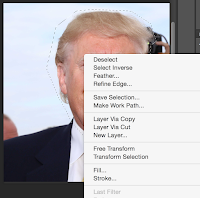
The lasso tool allows you to select the outline of an item for editing, copying etc. You have three options to draw around the object through the simple: lasso tool, polygenic lasso, and magnetic lasso tool. The polygenic creates straight lines, personally I find this one to be the most useful to me, so that I don’t accidentally leave out anything. Any sections that i don’t want from that selection I erase using the rubber tool. The magnetic tool clips to the significant change of hue, automatically attaching to where (it assumes) you want to cut.


Layers are individual items stacked on top of each other. These are useful for editing and creating designs.
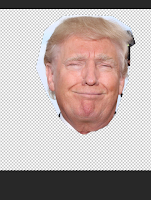
For example, the selected head of Donald Trump is one layer, and the baby’s body is another.
One tip for designing is to draw some rough sketches on paper beforehand. Photoshop has many features for experimentation, however, you should have an idea what you are going to do beforehand otherwise you will not get anywhere.
So you copy and paste your cutout onto the first image, and align it using distortion and rotation tools to make it fit. In my editing, I also played the with hue and saturation tools, to try and match the colours of the baby's body and Trump's head.
I also used the clone stamp tool, as there was a bit of the baby's face showing, so I used the pattern of the fur to replace it as shown in the image below.
 |
| This is a close up of the section I used the clone stamp tool for. Particularly between the arm and Trump's head. |
Tags:
a2


0 comments