Post-production: Visual editing
POST-PRODUCTION –
EDITING
Film editing is the practice of assembling shots into a
coherent sequence. The job of an editor is to fundamentally put the pieces of
film together, as well as touch up the audio and add extras e.g. titles, fonts
etc. The process is lengthy and requires attention to meticulous detail. We
must additionally look out for continuity, while creating syntax of film shots
that will keep the audience on their feet. To do this, we used Adobe Premiere
Pro CC for editing the footage. We may also Adobe Audition to create sound
effects and music for the sequence. The outcome is hopefully to have created an
exciting and tense opening sequence, filled with quick cuts and fast paced
shots, along with appropriate titles and sounds.
Before beginning to edit together the shots, we looked through all the footage in the media bin and gathered all the clips that we would potentially use. We particularly did this with the close ups of the keys, which would be the title shots. We dragged the desired title shots to the timeline to ‘’ them for further use. We chose the shots that were best suited for the sequence. Some shots were too dark, so we had to settle for another one instead. We wanted to have a sequence of shots that complimented each other. I learnt that editing includes careful consideration on which shots to use and where to put them – in order to tell the story clearly, as well as maintaining the continuity and cinematography. Sometimes the best shots may be not be appropriate to place anywhere in the sequence.
 |
| An example of a clip that is very long is 0.7, shown on the right monitor. |
 |
| The media bin with all the imported footage and different duplicated cuts we used |
 |
| The adobe timeline |
We began by creating the foundation of the sequence: the
rough cut. We assembled simple shots in the sequence that tells the story.
Through this, I learnt that regardless of whether you like the shots you
assembled, building the foundation is a vital component in editing. We cannot
begin to touch up on cutting and developing cinematography if we do not have
the foundation rough cut from beginning to end. Once we have the foundation, we
can then begin replacing some shots with more appropriate ones. It is essential
to see the story played out from beginning to end, to give us an idea of how
it’s going to look and how long it will be. The first few sessions were focused
on creating this foundation.
We simply arranged the shots into place and cut them easily through the timeline. The timeline allows us to manoeuvre clips to where we want them and view shots easily. The timeline also shows us audio which will allow us to manipulate sounds once our visual sequence is completed. Whilst looking through footage, we realised how frequent our actor swore during the film. We decided that the amount of swearing was too much and therefore we will try to mask some with sound effects such as gunshots.
We simply arranged the shots into place and cut them easily through the timeline. The timeline allows us to manoeuvre clips to where we want them and view shots easily. The timeline also shows us audio which will allow us to manipulate sounds once our visual sequence is completed. Whilst looking through footage, we realised how frequent our actor swore during the film. We decided that the amount of swearing was too much and therefore we will try to mask some with sound effects such as gunshots.
The benefit of our thriller is that the scene outline is
very repetitive. Our protagonist had to reach out for 3 batches of keys and try
each one in the padlock. This meant that we could mix up shots i.e. using a
shot from the 3rd batch with the 2nd, without ruining the
continuity. To reduce time, we cut out the second batch of keys from the scene
outline. Instead, we used shots from this cut batch, such as the close up of
the keys dropping, for other parts of the sequence. This taught us that editing
can be mixed up and doesn’t necessarily have to be in chronological order as
originally planned when filming.
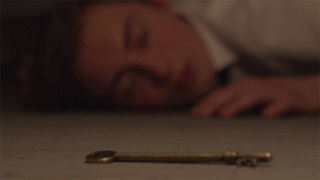
We explored different shots consecutive to each other. We
decided to add some close ups of keys as the protagonist looks around for the
first time. This is to show the audience what he is looking at. As the
character looks up and sees all the keys hanging, we cut to sped up pans of
keys. This builds a variety of shots, which is particularly important in
keeping the audience enticed. (Especially as our set is very simple and the
majority of the shots look very similar.) Additionally, the different variety
of shots creates more tension and panic; we can see why the protagonist is
panicked from the point of view shots.
We decided that when arranging the clips we would start with
only mid/close ups to keep that sense of claustrophobia running throughout the
sequence. We wanted to minimise the use of the long shot, however use it once
to show the audience the scale of the room. We decided that we would arrange
the title shots prior the action. We were particularly fond of the slow motion
close up shot of the filaments lighting up. We planned to use this to open the
whole sequence.

We used tools such as the
eraser tool to remove unwanted clips, however we didn’t use the razor tool, as
we have not yet had a need to split up a clip into multiple parts. (The razor
tool splits a clip into 2 sections) However, this tool would be very useful if
we were to do a shot-reverse-shot style edit. By exploring with different tools
and cutting different scenes: We began to carefully consider shot composition
in terms of length. Some shots were too long which therefore lead us to using
the cutting tools to reduce their length. This allows us to bring in a bigger
variety of different shots, rather than one tedious clip. Furthermore, we used
the tool to speed up some shots. We used this to reduce time and created more
tension and panic.
 |
| The speed/duration tool to speed up/down clips |
We finally decided that we would exclude the title shots from the sequence, as they will make the length too long. Instead, we will try and add titles over the main action.
Overall, through Adobe Premiere Pro, I have learnt to utilise different tools in editing and experienced the full process of assembling a edited piece of film together. The process is lengthy and requires a lot of concentration to detail, as well as stamina and motivation.
Tags:
a1


0 comments