This is our behind the scenes video, shot from an iPhone. We shot this to refer back to when we don't have the footage with us. This also displays the full scene outline unedited. In this video, you can also hear the terminology used when filming e.g. Rolling, action
For filming, we used the Sony FS100 camera and placed it on top of the Vinten tripod. Together these were easy to use. The camera had an interchangeable lens, which was useful for switching between distance shots and our close ups and focus pull shots. The tripod came with a handle, which allowed us to make smooth tilts and pans.
We took turns in different positions of filming. We had 4 roles:
 |
| SONY FS100 |
| Vinten Tripod |
We took turns in different positions of filming. We had 4 roles:
- Camera operator
- Sound operator
- Director
- Continuitist and battery/mini screen holder
I started with being the sound operator. I held the shotgun microphone at arm's length to pick up the best quality sound. Hannah was operating the camera, Fran was the director and Jess had the mini-screen and battery. We noted down the shots we used throughout filming.
We took our actor Charlie through the scene outline and what we wanted him to do. This included how many batches of keys he'd take and what he would do on each attempt i.e. drop the keys on the third batch.
We started with a long shot of the room, before moving on to mid shots and close ups. After each shot we had to reset the scene by re-stapling the keys to the ceiling. We marked the ceiling so we knew where to put the keys up. From this I learnt the length it takes to film each shot, as we had to re-create the scene between each take. This helped me to look out for continuity whilst filming, which will reduce errors in post-production. Furthermore, whilst filming - sometimes the padlock had come loose from it's lock, as it's very old and Charlie had been moving it around during each take. I noticed this during a few takes whilst being the camera operator or continuitist watching the small screen. We then shouted cut and fixed the problem before resetting and starting another take.
 |
| Rehearsing for the shoot |
  |
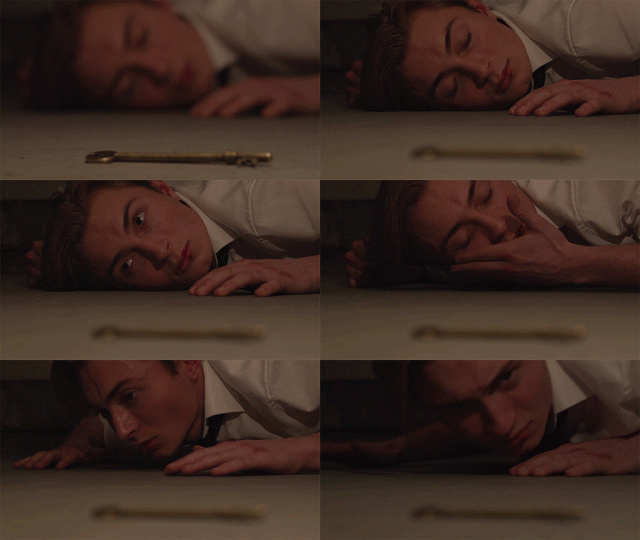
As Charlie had requested to go to his theatre lesson, we decided that in his absence we would film the title shots, as he was not needed. For these, we captured extreme close ups of keys and other parts of the set. We rolled for 30 seconds each, so we had plenty of time to cut for post-production. We also shot a POV pan from one key to the next. This is to show the audience what the protagonist is seeing. We panned slowly across the keys and used a focus pull. Through this, I learnt that we should always film something normally, even if you have intentions for that particular shot in post-production. I.e. if we wanted the shot to be quick or in a different colour. For this particular shot, we wanted to speed it up, so it looks frantic. We therefore shot it normally and speed it up in post-production.
Our makeup artist Sasha came in early in the morning, and we explained to her exactly what we wanted. We decided that we wanted a gash on the cheek, as well as a small cut on the lip and bloody bruised knuckles.
Charlie, our actor had brought in his own suit for the shoot. We told him to skew the tie up slightly, roll the sleeves and remove the blazer. All of this is to show that the character has been beaten up beforehand.
Charlie, our actor had brought in his own suit for the shoot. We told him to skew the tie up slightly, roll the sleeves and remove the blazer. All of this is to show that the character has been beaten up beforehand.
We thought about perhaps setting up an iron bar in front of some lighting, which would cast striped shadow in the set. This was to represent a jail door and connote to the audience better that he was in a cell. However, the shadows reduced the eery atmosphere and the feeling of isolation and claustrophobia no longer applied. Therefore we decided not to use these.
 |
| Iron Bars to represent a jail door, which would be placed in front of a light to cast shadows |
We began by setting up the final keys and making sure that all the keys were equally distributed. For the padlock we used a cable tie which we placed around the door handle.
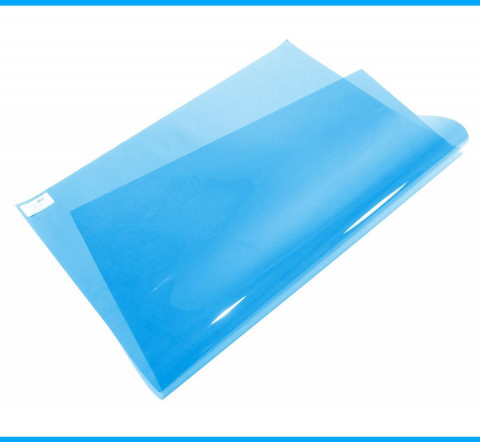
For extra lighting, we used a daylight fresnel light and placed a daylight blue gel in front of this. We directed this towards the padlock at the door. This is to add extra lighting to the dark door and padlock, as well as connote a sense of hope to the trapped protagonist.
This is what the lighting on the padlock looked like from the audience's POV
For extra lighting, we used a daylight fresnel light and placed a daylight blue gel in front of this. We directed this towards the padlock at the door. This is to add extra lighting to the dark door and padlock, as well as connote a sense of hope to the trapped protagonist.
 |
 |
| daylight blue gel |
We created a timelapse to demonstrate the time it took to build the set. In total, it took approximately over 5 hours to construct. We were originally going to place a locking mechanism on the door for the padlock to slot in, we were to make this out cardboard. However this would not look at all realistic out of cardboard, and it would be very difficult to install this. We therefore decided to use a chain stretching from each corner of the door.
| This is originally what we had in mind for the door. |
Today we began to build the set. With Paul's help, we started by painting the ceiling flats grey.

- We then placed the 3 wall flats on each side of the door. And clamped it using G-clamps.
- We then began to place the ceiling flats on top of the walls. Between each crack of the flats, we hung 2 lights equally. We some of them slightly shorter than the others to make the room look more complex.
- The next step was to staple the breezeblock texture to the walls, and paint the top and bottom edges where the breezeblock missed.
- We then began to staple the keys to the ceiling, we created a system where two of us would staple the keys with guns, one would untangle and hand us the keys, and then one would cut of the remaining strays of fish line. We hung them at different heights to create a better picture, and tried to distribute them as equally as possible.
- Our final step is to paint the floor grey. This we did overnight to leave to dry by morning.

As we began building the set, half of our group began bringing the keys down from the board where we had pinned them up. As there are so many keys and fish line, the keys got very tangled. We therefore had to dedicate a few hours to untangling the keys and transporting them to the set to be stapled.
This is our updated set design, including the keys hanging on the ceiling and the lightbulbs. This was designed on Photoshop CS6.
A shot list is a document that lists and describes the shots to be filmed during principal photography.
Shots are not in order of filming. This comes later on in the process and becomes a document known as the shooting schedule.
When filling in each row in the shot list, it’s important to take into consideration the following elements:
- Characters in the shot
- Type of shot
- Camera movement
- Major actions
- Important objects
In our production, we have a few shots in mind that may require special camera equipment.
A camera dolly is a specialized piece of filmmaking and television production equipment designed to create smooth camera movements. The camera is mounted to the dolly and the camera operator usually ride on the dolly to operate the camera. The dolly grip is the dedicated technician trained to operate the dolly.
A camera dolly is a specialized piece of filmmaking and television production equipment designed to create smooth camera movements. The camera is mounted to the dolly and the camera operator usually ride on the dolly to operate the camera. The dolly grip is the dedicated technician trained to operate the dolly.
Steadicam is a type of camera stabilizer against the operator's movement. It allows for a smooth shot, even when moving quickly over an uneven surface. The Steadicam was invented by cameraman Garrett Brown and was introduced in 1975.
A tripod is used to stabilize and elevate a camera, a flash unit, or other photographic equipment. All photographic tripods have three legs and a mounting head to couple with a camera.
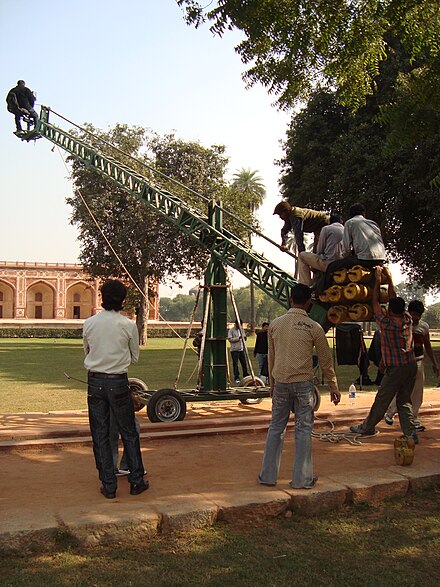
A crane shot is a shot taken by a camera on a crane or jib. The most obvious uses are to view the actors from above or to move up and away from them, a common way of ending a movie.
CROESO
Ella's Hurtwood House Media Blog
POPULAR POSTS
-
Madonna's hit single "Like a prayer" was released in 1989, a time of racial and religious order a...
-
Establishing Shot: Usually the first shot of a scene. Lets audience know where action is taking place. Usually a very/extreme wide shot. ...
-
STUDIO LESSON We began with learning about the 180 degree rule. We saw a demonstration of a motorbike traveling across a road to visua...
-
Last week we learnt about the different cameras used in media, and how they function to get the best possible setting. We first explored the...
-
Thriller is a genre that uses excitement, suspense and tension as its key elements. Aviation : A thriller that is set on an air flight, ...
-
I began looking at websites as a component of music campaigns. I compared the websites of Ariana Grande and Rihanna, both very popular arti...
-
The Imitation Game directed by Morton Tyldum, tells the story of a newly created British Intelligence Agency (MI6) , which recruit...
-
The Woman in Black (directed by James Watkin in 2012) would typically be classed as a horror film or a paranormal thriller. Likewise, ...
-
In this weeks studio lesson, as part of coursework we created a short film sequence in a group of four. The preliminary task required us t...
-
Audience Profiling is a very important factor to consider for the success of our music video. It simply defines the audience by segmenting t...


