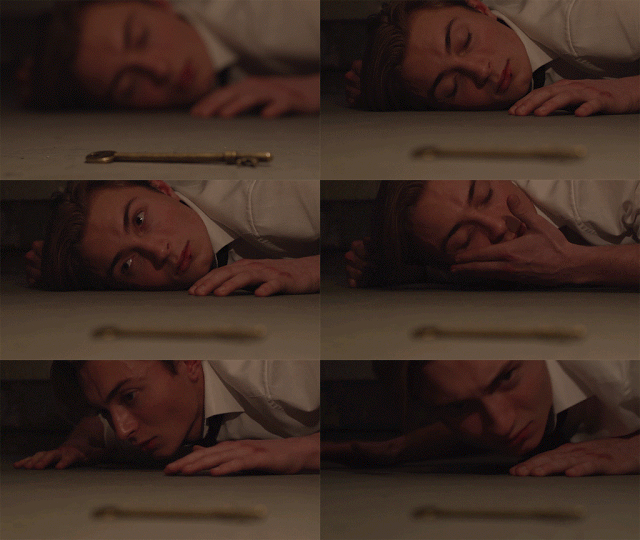
We had begun to consider different titles for our thriller before, eventually almost naming it Parapraxis (which means a slip of the tongue) We had also considered Deathrow, however this title would only refer to the opening sequence and not the whole film.
As we had chosen the producers to be a studio called Biondani Studios: named after Fran in our group, we wanted to continue the Italian styled titles. We wanted the title to be effective and compliment the thriller well.
 We produced many different possibilities for titles, particularly ones in a different language. We tried Spanish, Italian, Polish and French. We wanted to use a foreign title to create a sense of mystery but beauty for the audience. We favoured Italian as it's a beautiful language and ties in with Biondani Studios. Our favourites were Lealtá and Fedeltá, meaning loyalty and faithfulness. However, as these were accented we thought it would be difficult for British audience members to pronunciate. Furthermore, a foreign looking titles suggests a foreign film, in which British audience members may be put off by as they assume it will be difficult to understand.
We finally resulted in The Salvatore. This is an Italian surname, meaning saviour. We thought this sounded audibly nice, and could refer to the character's name as well as the theme of the film. Furthermore, Salvatore can also be pronounced easily by British members.


As we had chosen the producers to be a studio called Biondani Studios: named after Fran in our group, we wanted to continue the Italian styled titles. We wanted the title to be effective and compliment the thriller well.

We finally resulted in The Salvatore. This is an Italian surname, meaning saviour. We thought this sounded audibly nice, and could refer to the character's name as well as the theme of the film. Furthermore, Salvatore can also be pronounced easily by British members.


For sound, we originally planned to create a soundtrack that increases the tension and suspense. We figured the soundtrack would either put the cherry on top of the thriller, or completely ruin the entire thing.
We eventually decided that using a sound track, along with sound effects and lots of action visually, would be too much to absorb in such a short amount of time.
We instead only created sound effects, by layering different sounds on top of each other. We used different sounds from the school's sound effect file 'Hurtwood RAID'. Some of these sound effects included, gun shots, bullets dropping, body dropping, jail door opening, dripping sounds, footsteps and talking in the background.
We started with the dripping sounds. We put these on a loop for the entire sequence, including title cards. We used different layers in adobe premiere pro to assemble the different sounds together. The original gunshot and door clips had multiple different versions (reverbs and durations) throughout the clip. We used each version on our thriller so that the sound effects do not sound exactly the same and realistic. With the gunshot, comes the footsteps, the door opening, the bullets falling and body falling.
We placed these clips all together on the timeline to happen one after the other. We then copied this across the sequence. We allowed hesitation between some sounds such as footsteps to door, door to gunshot. We varied this pause for each version of sound sequence, so that it doesn't sound robotic. People would not proceed each stage with the same duration of hesitation. We wanted the audience to think the sound effects were a person offscreen walking closer. The pauses between door and gunshot etc allows this person to hesitate and breath, as any human would.
We placed this gun sequence throughout at different spots in the thriller. It was vital to have one significantly loud gun shot where our actor imagined a shot; and the ending where he is just about to place the key in the padlock.


We increase the volume further into the sequence, to represent the enemy coming closer and closer to the character. This is important to show his distance from the visual action as it is the stimulus of his panic.
Once we had the sound sequence assembled. We exported the file as a waveform audio. (Audio only, image not included)

We then opened up Adobe Audition, another program that helps us edit sound. The sound effects felt too robotic and unrealistic.

So we decided to add reverb and delay to the sounds. These features distort the sequence into sounding metallic. As if sound was bouncing off metallic floors and walls. We explored with different settings to eventually get the sound we want. Delay also adds a more realistic effect on the sound sequence.
We finally saved the audio again and replaced the first cut with our final sequence in premiere pro.
Only difficulty we ran into, is that after we had used audition, all the different layers merged into one. This means that if we wanted to tweak something in particular, we couldn't unless dissecting the one layer or editing it as a whole.


We instead only created sound effects, by layering different sounds on top of each other. We used different sounds from the school's sound effect file 'Hurtwood RAID'. Some of these sound effects included, gun shots, bullets dropping, body dropping, jail door opening, dripping sounds, footsteps and talking in the background.
We started with the dripping sounds. We put these on a loop for the entire sequence, including title cards. We used different layers in adobe premiere pro to assemble the different sounds together. The original gunshot and door clips had multiple different versions (reverbs and durations) throughout the clip. We used each version on our thriller so that the sound effects do not sound exactly the same and realistic. With the gunshot, comes the footsteps, the door opening, the bullets falling and body falling.
We placed these clips all together on the timeline to happen one after the other. We then copied this across the sequence. We allowed hesitation between some sounds such as footsteps to door, door to gunshot. We varied this pause for each version of sound sequence, so that it doesn't sound robotic. People would not proceed each stage with the same duration of hesitation. We wanted the audience to think the sound effects were a person offscreen walking closer. The pauses between door and gunshot etc allows this person to hesitate and breath, as any human would.
We placed this gun sequence throughout at different spots in the thriller. It was vital to have one significantly loud gun shot where our actor imagined a shot; and the ending where he is just about to place the key in the padlock.


We increase the volume further into the sequence, to represent the enemy coming closer and closer to the character. This is important to show his distance from the visual action as it is the stimulus of his panic.
Once we had the sound sequence assembled. We exported the file as a waveform audio. (Audio only, image not included)

We then opened up Adobe Audition, another program that helps us edit sound. The sound effects felt too robotic and unrealistic.

So we decided to add reverb and delay to the sounds. These features distort the sequence into sounding metallic. As if sound was bouncing off metallic floors and walls. We explored with different settings to eventually get the sound we want. Delay also adds a more realistic effect on the sound sequence.
We finally saved the audio again and replaced the first cut with our final sequence in premiere pro.
Only difficulty we ran into, is that after we had used audition, all the different layers merged into one. This means that if we wanted to tweak something in particular, we couldn't unless dissecting the one layer or editing it as a whole.

 |
| reverb setting on the sound sequence |

POST-PRODUCTION –
EDITING
Film editing is the practice of assembling shots into a
coherent sequence. The job of an editor is to fundamentally put the pieces of
film together, as well as touch up the audio and add extras e.g. titles, fonts
etc. The process is lengthy and requires attention to meticulous detail. We
must additionally look out for continuity, while creating syntax of film shots
that will keep the audience on their feet. To do this, we used Adobe Premiere
Pro CC for editing the footage. We may also Adobe Audition to create sound
effects and music for the sequence. The outcome is hopefully to have created an
exciting and tense opening sequence, filled with quick cuts and fast paced
shots, along with appropriate titles and sounds.
Before beginning to edit together the shots, we looked through all the footage in the media bin and gathered all the clips that we would potentially use. We particularly did this with the close ups of the keys, which would be the title shots. We dragged the desired title shots to the timeline to ‘’ them for further use. We chose the shots that were best suited for the sequence. Some shots were too dark, so we had to settle for another one instead. We wanted to have a sequence of shots that complimented each other. I learnt that editing includes careful consideration on which shots to use and where to put them – in order to tell the story clearly, as well as maintaining the continuity and cinematography. Sometimes the best shots may be not be appropriate to place anywhere in the sequence.
 |
| An example of a clip that is very long is 0.7, shown on the right monitor. |
 |
| The media bin with all the imported footage and different duplicated cuts we used |
 |
| The adobe timeline |
We began by creating the foundation of the sequence: the
rough cut. We assembled simple shots in the sequence that tells the story.
Through this, I learnt that regardless of whether you like the shots you
assembled, building the foundation is a vital component in editing. We cannot
begin to touch up on cutting and developing cinematography if we do not have
the foundation rough cut from beginning to end. Once we have the foundation, we
can then begin replacing some shots with more appropriate ones. It is essential
to see the story played out from beginning to end, to give us an idea of how
it’s going to look and how long it will be. The first few sessions were focused
on creating this foundation.
We simply arranged the shots into place and cut them easily through the timeline. The timeline allows us to manoeuvre clips to where we want them and view shots easily. The timeline also shows us audio which will allow us to manipulate sounds once our visual sequence is completed. Whilst looking through footage, we realised how frequent our actor swore during the film. We decided that the amount of swearing was too much and therefore we will try to mask some with sound effects such as gunshots.
We simply arranged the shots into place and cut them easily through the timeline. The timeline allows us to manoeuvre clips to where we want them and view shots easily. The timeline also shows us audio which will allow us to manipulate sounds once our visual sequence is completed. Whilst looking through footage, we realised how frequent our actor swore during the film. We decided that the amount of swearing was too much and therefore we will try to mask some with sound effects such as gunshots.
The benefit of our thriller is that the scene outline is
very repetitive. Our protagonist had to reach out for 3 batches of keys and try
each one in the padlock. This meant that we could mix up shots i.e. using a
shot from the 3rd batch with the 2nd, without ruining the
continuity. To reduce time, we cut out the second batch of keys from the scene
outline. Instead, we used shots from this cut batch, such as the close up of
the keys dropping, for other parts of the sequence. This taught us that editing
can be mixed up and doesn’t necessarily have to be in chronological order as
originally planned when filming.
We explored different shots consecutive to each other. We
decided to add some close ups of keys as the protagonist looks around for the
first time. This is to show the audience what he is looking at. As the
character looks up and sees all the keys hanging, we cut to sped up pans of
keys. This builds a variety of shots, which is particularly important in
keeping the audience enticed. (Especially as our set is very simple and the
majority of the shots look very similar.) Additionally, the different variety
of shots creates more tension and panic; we can see why the protagonist is
panicked from the point of view shots.
We decided that when arranging the clips we would start with
only mid/close ups to keep that sense of claustrophobia running throughout the
sequence. We wanted to minimise the use of the long shot, however use it once
to show the audience the scale of the room. We decided that we would arrange
the title shots prior the action. We were particularly fond of the slow motion
close up shot of the filaments lighting up. We planned to use this to open the
whole sequence.

We used tools such as the
eraser tool to remove unwanted clips, however we didn’t use the razor tool, as
we have not yet had a need to split up a clip into multiple parts. (The razor
tool splits a clip into 2 sections) However, this tool would be very useful if
we were to do a shot-reverse-shot style edit. By exploring with different tools
and cutting different scenes: We began to carefully consider shot composition
in terms of length. Some shots were too long which therefore lead us to using
the cutting tools to reduce their length. This allows us to bring in a bigger
variety of different shots, rather than one tedious clip. Furthermore, we used
the tool to speed up some shots. We used this to reduce time and created more
tension and panic.
 |
| The speed/duration tool to speed up/down clips |
We finally decided that we would exclude the title shots from the sequence, as they will make the length too long. Instead, we will try and add titles over the main action.
Overall, through Adobe Premiere Pro, I have learnt to utilise different tools in editing and experienced the full process of assembling a edited piece of film together. The process is lengthy and requires a lot of concentration to detail, as well as stamina and motivation.
As our costume had dry bloodstains on it, we agreed that we would arrange and pay the dry cleaning for Charlie's suit.

We filmed 10-20 different title shots by shooting different close ups and extreme close ups of keys and lightbulbs.
We shot each title for 30 seconds so we have enough footage to edit with. For some shots, we particularly struggled with some shots when trying to achieve a smooth focus pull.
For instance, when filming the filaments lighting up, we set the camera to a slow motion setting. We had two lightbulbs in the shot, one on the left in the foreground and on the right in the back. The camera only allowed us around 3 seconds to focus pull and capture the footage. This meant we had to focus pull quickly but smoothly; we had to match the focus pull perfectly to make each lightbulb clear and sharp. The camera displayed to us what is in focus, however this was still extremely difficult as we kept slightly pulling too much/too little. This particular shot took about 5-7 takes.
We quickly drew a sketch of each title shot, to keep a record of what we had captured.
We shot each title for 30 seconds so we have enough footage to edit with. For some shots, we particularly struggled with some shots when trying to achieve a smooth focus pull.
For instance, when filming the filaments lighting up, we set the camera to a slow motion setting. We had two lightbulbs in the shot, one on the left in the foreground and on the right in the back. The camera only allowed us around 3 seconds to focus pull and capture the footage. This meant we had to focus pull quickly but smoothly; we had to match the focus pull perfectly to make each lightbulb clear and sharp. The camera displayed to us what is in focus, however this was still extremely difficult as we kept slightly pulling too much/too little. This particular shot took about 5-7 takes.
We quickly drew a sketch of each title shot, to keep a record of what we had captured.
 |
| These are the title shots that we filmed |
This is our behind the scenes video, shot from an iPhone. We shot this to refer back to when we don't have the footage with us. This also displays the full scene outline unedited. In this video, you can also hear the terminology used when filming e.g. Rolling, action
For filming, we used the Sony FS100 camera and placed it on top of the Vinten tripod. Together these were easy to use. The camera had an interchangeable lens, which was useful for switching between distance shots and our close ups and focus pull shots. The tripod came with a handle, which allowed us to make smooth tilts and pans.
We took turns in different positions of filming. We had 4 roles:


 |
| SONY FS100 |
 |
| Vinten Tripod |
We took turns in different positions of filming. We had 4 roles:
- Camera operator
- Sound operator
- Director
- Continuitist and battery/mini screen holder
I started with being the sound operator. I held the shotgun microphone at arm's length to pick up the best quality sound. Hannah was operating the camera, Fran was the director and Jess had the mini-screen and battery. We noted down the shots we used throughout filming.
We took our actor Charlie through the scene outline and what we wanted him to do. This included how many batches of keys he'd take and what he would do on each attempt i.e. drop the keys on the third batch.
We started with a long shot of the room, before moving on to mid shots and close ups. After each shot we had to reset the scene by re-stapling the keys to the ceiling. We marked the ceiling so we knew where to put the keys up. From this I learnt the length it takes to film each shot, as we had to re-create the scene between each take. This helped me to look out for continuity whilst filming, which will reduce errors in post-production. Furthermore, whilst filming - sometimes the padlock had come loose from it's lock, as it's very old and Charlie had been moving it around during each take. I noticed this during a few takes whilst being the camera operator or continuitist watching the small screen. We then shouted cut and fixed the problem before resetting and starting another take.
 |
| Rehearsing for the shoot |
  |
As Charlie had requested to go to his theatre lesson, we decided that in his absence we would film the title shots, as he was not needed. For these, we captured extreme close ups of keys and other parts of the set. We rolled for 30 seconds each, so we had plenty of time to cut for post-production. We also shot a POV pan from one key to the next. This is to show the audience what the protagonist is seeing. We panned slowly across the keys and used a focus pull. Through this, I learnt that we should always film something normally, even if you have intentions for that particular shot in post-production. I.e. if we wanted the shot to be quick or in a different colour. For this particular shot, we wanted to speed it up, so it looks frantic. We therefore shot it normally and speed it up in post-production.


Our makeup artist Sasha came in early in the morning, and we explained to her exactly what we wanted. We decided that we wanted a gash on the cheek, as well as a small cut on the lip and bloody bruised knuckles.
Charlie, our actor had brought in his own suit for the shoot. We told him to skew the tie up slightly, roll the sleeves and remove the blazer. All of this is to show that the character has been beaten up beforehand.


Charlie, our actor had brought in his own suit for the shoot. We told him to skew the tie up slightly, roll the sleeves and remove the blazer. All of this is to show that the character has been beaten up beforehand.


We thought about perhaps setting up an iron bar in front of some lighting, which would cast striped shadow in the set. This was to represent a jail door and connote to the audience better that he was in a cell. However, the shadows reduced the eery atmosphere and the feeling of isolation and claustrophobia no longer applied. Therefore we decided not to use these.
 |
| Iron Bars to represent a jail door, which would be placed in front of a light to cast shadows |
We began by setting up the final keys and making sure that all the keys were equally distributed. For the padlock we used a cable tie which we placed around the door handle.
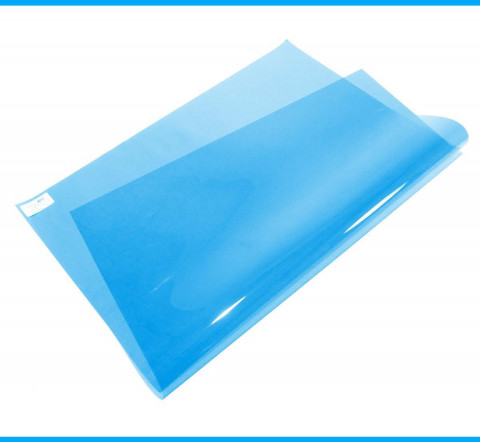
For extra lighting, we used a daylight fresnel light and placed a daylight blue gel in front of this. We directed this towards the padlock at the door. This is to add extra lighting to the dark door and padlock, as well as connote a sense of hope to the trapped protagonist.


This is what the lighting on the padlock looked like from the audience's POV
For extra lighting, we used a daylight fresnel light and placed a daylight blue gel in front of this. We directed this towards the padlock at the door. This is to add extra lighting to the dark door and padlock, as well as connote a sense of hope to the trapped protagonist.
 |
 |
| daylight blue gel |
CROESO

Ella's Hurtwood House Media Blog
POPULAR POSTS
-
Madonna's hit single "Like a prayer" was released in 1989, a time of racial and religious order a...
-
 Establishing Shot: Usually the first shot of a scene. Lets audience know where action is taking place. Usually a very/extreme wide shot. ...
-
 STUDIO LESSON We began with learning about the 180 degree rule. We saw a demonstration of a motorbike traveling across a road to visua...
-
 The Imitation Game directed by Morton Tyldum, tells the story of a newly created British Intelligence Agency (MI6) , which recruit...
-
 Last week we learnt about the different cameras used in media, and how they function to get the best possible setting. We first explored the...
-
 I began looking at websites as a component of music campaigns. I compared the websites of Ariana Grande and Rihanna, both very popular arti...
-
 Thriller is a genre that uses excitement, suspense and tension as its key elements. Aviation : A thriller that is set on an air flight, ...
-
The Woman in Black (directed by James Watkin in 2012) would typically be classed as a horror film or a paranormal thriller. Likewise, ...
-
 In this weeks studio lesson, as part of coursework we created a short film sequence in a group of four. The preliminary task required us t...
-
 A shot list is a document that lists and describes the shots to be filmed during principal photography. Shot List for Memento (...