We began by setting up the final keys and making sure that all the keys were equally distributed. For the padlock we used a cable tie which we placed around the door handle.
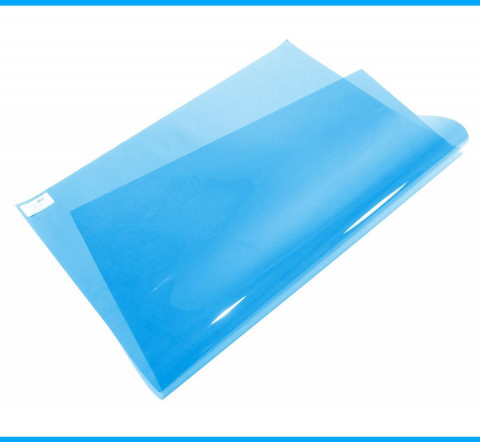
For extra lighting, we used a daylight fresnel light and placed a daylight blue gel in front of this. We directed this towards the padlock at the door. This is to add extra lighting to the dark door and padlock, as well as connote a sense of hope to the trapped protagonist.
This is what the lighting on the padlock looked like from the audience's POV
daylight blue gel
We created a timelapse to demonstrate the time it took to build the set. In total, it took approximately over 5 hours to construct. We were originally going to place a locking mechanism on the door for the padlock to slot in, we were to make this out cardboard. However this would not look at all realistic out of cardboard, and it would be very difficult to install this. We therefore decided to use a chain stretching from each corner of the door.
This is originally what we had in mind for the door.
Today we began to build the set. With Paul's help, we started by painting the ceiling flats grey.
We then placed the 3 wall flats on each side of the door. And clamped it using G-clamps.
We then began to place the ceiling flats on top of the walls. Between each crack of the flats, we hung 2 lights equally. We some of them slightly shorter than the others to make the room look more complex.
The next step was to staple the breezeblock texture to the walls, and paint the top and bottom edges where the breezeblock missed.
We then began to staple the keys to the ceiling, we created a system where two of us would staple the keys with guns, one would untangle and hand us the keys, and then one would cut of the remaining strays of fish line. We hung them at different heights to create a better picture, and tried to distribute them as equally as possible.
Our final step is to paint the floor grey. This we did overnight to leave to dry by morning.
As we began building the set, half of our group began bringing the keys down from the board where we had pinned them up. As there are so many keys and fish line, the keys got very tangled. We therefore had to dedicate a few hours to untangling the keys and transporting them to the set to be stapled.
This is our updated set design, including the keys hanging on the ceiling and the lightbulbs. This was designed on Photoshop CS6.
A shot list is a document that lists and describes the shots to be filmed during principal photography.
Shot List for Memento (not official)
Shots are not in order of filming. This comes later on in the process and becomes a document known as the shooting schedule.
When filling in each row in the shot list, it’s important to take into consideration the following elements:
Characters in the shot
Type of shot
Camera movement
Major actions
Important objects
In our production, we have a few shots in mind that may require special camera equipment.
A camera dolly is a specialized piece of filmmaking and television production equipment designed to create smooth camera movements. The camera is mounted to the dolly and the camera operatorusually ride on the dolly to operate the camera. The dolly grip is the dedicated technician trained to operate the dolly.
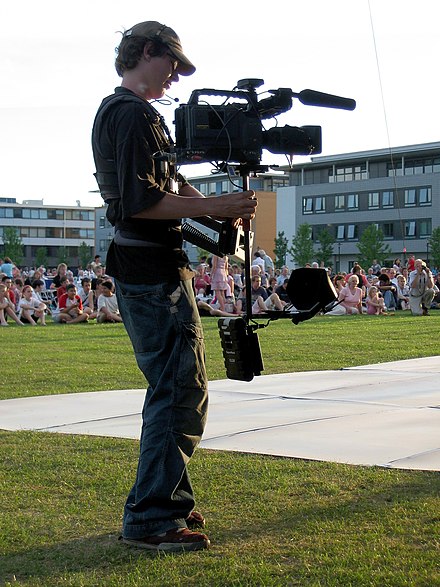
Steadicam is a type of camera stabilizer against the operator's movement. It allows for a smooth shot, even when moving quickly over an uneven surface. The Steadicam was invented by cameraman Garrett Brown and was introduced in 1975.
A tripod is used to stabilize and elevate a camera, a flash unit, or other photographic equipment. All photographic tripods have three legs and a mounting head to couple with a camera.
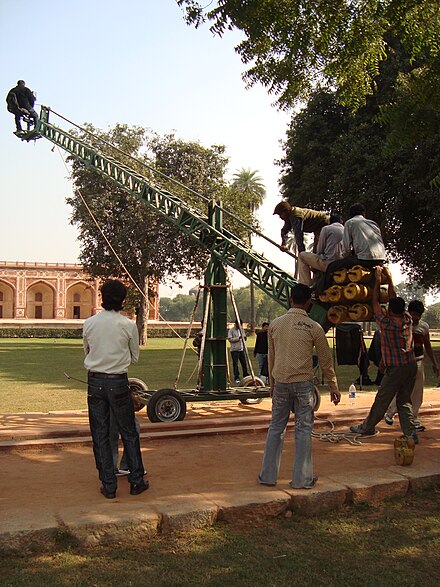
A crane shot is a shot taken by a camera on a crane or jib. The most obvious uses are to view the actors from above or to move up and away from them, a common way of ending a movie.
As the real key is a rustic silver, and all the other keys are gold. We decided that we needed to spray paint the key gold so that it doesn't stand out (which would defeat the point of the film)
The real key attached to the padlock
I first went to the art department, but they didn't have any spray paints available to use immediately due to health and safety hazards. I tried painting it a gold colour, however this didn't work as the paint wouldn't set and the key turned orange. I quickly washed the attempted paint off and tried the theatre set department. The set designer, Al, had what I needed. We attached the key onto some metal wire, so that we don't have to touch it, and spray-painted it with a base of simple gold spray paint. We then layered it with some metallic gold spray paint, to make it look authentic. We then coated it with some more metallic spray and let it dry
Furthermore, we ordered more keys that were identical to our preferred biggest ones. We ordered an extra 5 batches, which is approximately around 180.
We spoke to Paul again and he said that we would order some more breezeblock, as there is not enough to cover the flats. He will also buy some grey paint all in the same colour.
For our set, we will use 3 flats each side and 3 flats as the ceiling. This should be big enough for us to film enough but maintain that claustrophobic feel. The flats should also be tall enough and long enough to keep the doorframe within the shot.